Category Archives: How-to

Use DD to Quickly Benchmark Your CPU

Category : How-to

Get Social!

Let me start by saying… this is a quick and dirty method and shouldn’t be used for precise comparisons of CPU performance. That said, it’s perfectly adequate for approximating CPU performance, especially on Cloud hosted VPSs to ensure you’re getting the horsepower that you’re being promised.

The idea here is to force your machine to perform tasks that will be computationally expensive to force your CPU to work at 100 percent and become the bottleneck for the task (rather than disk I/ O, etc.). This task will then be timed. The shorter times will generally represent faster CPU’s and longer results would indicate a slower CPU.

[the_ad id=”2698″]

CPU benchmark

The md5sum command is a tool that creates an MD5 hash of some data. We can generate some data on the fly with dd and pipe it into the md5sum tool to create a computationally expensive task. We’ll limit the data to hash and time the length of time it takes to create the hash.

Run the below to start the test. If your result completes in under 2 seconds then increase the count=1k value to a higher value, for example count=10k.

dd if=/dev/zero bs=1M count=1k | md5sum

You’ll get an output similar to the below output.

1024+0 records in
1024+0 records out
1073741824 bytes (1.1 GB) copied, 2.38909 s, 449 MB/s
cd573cfaace07e7949bc0c46028904ff  -

There are a couple of items that you’re interested in here, and the rest can be ignored.

  • 2.38909 s is the time it took in seconds for the operation to complete. This is the number to use for comparison with other machines – lower is better.
  • 449 MB/s is the speed that the data was fabricated and push into the md5sum tool to be hashed – higher is better.


CPU details with cpuinfo

Linux has various nuggets of information about your system available in the proc directory on a linux root partition. You can cat various files, such as /proc/cpuinfo, to see system specifications and metrics.

/proc/cpuinfo

The output will look similar to the below output that shows a Xeon CPU running at a clock speed of 2.50GHz.

processor       : 0
vendor_id       : GenuineIntel
cpu family      : 6
model           : 62
model name      : Intel(R) Xeon(R) CPU @ 2.50GHz
stepping        : 4
microcode       : 0x1
cpu MHz         : 2500.000
cache size      : 30720 KB
physical id     : 0
siblings        : 1
core id         : 0
cpu cores       : 1
apicid          : 0
initial apicid  : 0
fpu             : yes
fpu_exception   : yes
cpuid level     : 13
wp              : yes
flags           : fpu vme de pse tsc msr pae mce cx8 apic sep mtrr pge mca cmov pat pse36 clflush mmx fxsr sse sse2 ss ht sysca
ll nx pdpe1gb rdtscp lm constant_tsc nopl xtopology eagerfpu pni pclmulqdq ssse3 cx16 sse4_1 sse4_2 x2apic popcnt aes xsave avx
 f16c rdrand hypervisor lahf_lm xsaveopt fsgsbase smep
bogomips        : 5000.00
clflush size    : 64
cache_alignment : 64
address sizes   : 46 bits physical, 48 bits virtual


Install Oracle Java In Debian/ Ubuntu using apt-get

Category : How-to

Get Social!

java-logo

Oracle Java, due to Oracle’s license conditions, it quite a pain to install. The problem is that anyone who isn’t Oracle isn’t allowed to distribute the JDK binaries – they have to be downloaded strictly from Oracle. Luckily the guys over at webupd8team have been creative in this area and created and apt-get package that downloads the Java binaries from Oracle, presents the license agreement that you have to accept and and installs Java on the local machine.

Add Java Repository Using apt-add-repository on Ubuntu

We’ll use the apt-add-repository tool in this section to add the webupd8team’s ppa repository to our local apt package manager. This method should be used on Ubuntu – see the next section for Debian.

Before running the command, make sure you’ve got apt-add-repository installed as it’s often missing in the more minimal installations.

apt-get install software-properties-common

Older versions of Ubuntu (13.10 and older) would need a slightly different package:

apt-get install python-software-properties

Once you’ve got the package installed, go ahead and add the ppa Java repository and update your local apt cache with the new available packages.

apt-add-repository ppa:webupd8team/java
apt-get update

Add Java Repository Manually on Debian

If you’re using Debian or would like to manually add and maintain the list of repositories used by your apt installation then use the below commands.

echo "deb http://ppa.launchpad.net/webupd8team/java/ubuntu xenial main" | tee /etc/apt/sources.list.d/webupd8team-java.list
echo "deb-src http://ppa.launchpad.net/webupd8team/java/ubuntu xenial main" | tee -a /etc/apt/sources.list.d/webupd8team-java.list
apt-key adv --keyserver hkp://keyserver.ubuntu.com:80 --recv-keys EEA14886
apt-get update

This will create a new file containing the repository location in /etc/apt/sources.list.d/webupd8team-java.list


Installing Oracle Java

When using this method, the first step of the install process is to download the Oracle Java binaries from Oracle.com. You’ll then need to accept the license agreement and then the installation will begin.

You can automatically accept the license agreement, which is useful when scripting the install where it’s impossible to interact with the process. The first command in the following sections instructs the install to automatically accept the license agreement. If you’d like to read and manually accept the agreement then do not run the first line.

Choose your Java version:

Install Java 7

For Oracle JDK7 use:

echo oracle-java7-installer shared/accepted-oracle-license-v1-1 select true | /usr/bin/debconf-set-selections
apt-get install oracle-java7-installer

Install Java 8

For Oracle JDK8 use:

echo oracle-java8-installer shared/accepted-oracle-license-v1-1 select true | /usr/bin/debconf-set-selections
apt-get install oracle-java8-installer


Java Variables

Finally, you can set the Java variables automatically using another package provided by the webupd8team. Upgrading, say from Java 7 to Java 8 will automatically remove the predecessors package.

apt-get install oracle-java7-set-default

Or

apt-get install oracle-java8-set-default

Scripted Install

See the following for copy and paste scripts for installing:


Train SpamAssassin Spam Email Message Detection in Zentyal

Category : How-to

Get Social!

SpamAssassin_logo

SpamAssassin does a great job at identifying SPAM emails and is probably one of the most popular in it’s class. An important part of fighting SPAM email is keeping up with the changes in both SPAM and non-SPAM (often called Ham) email content. Luckily for us, whatever magic SpamAssassin employs to decide if email is SPAM or not can be trained so that emails wrongly classified can be correctly classified in future.

I’m using SpamAssasin as part of Zentyal email server, however a stand alone SpamAssassin install could also be used with a similar process.

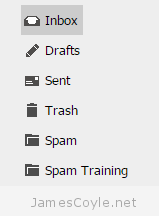
spam-training-inboxThe first step is to create a folder for a given email account which will be used to manually classify SPAM email messages. You could use your existing SPAM/ Junk folder but I’ve called mine ‘Spam Training’ to keep it separate. When you receive email to your inbox that hasn’t been classed as SPAM but should be, you’ll manually move the email to your new ‘Spam Training’ folder and SpamAssassin will update it’s detection routine accordingly. Messages could be falsely marked as SPAM and kept in the SPAM folder and you wouldn’t want SpamAssassin to automatically learn those to be SPAM which is why I’ve kept them separate.

Cron Job

The next step is to set up a cron that will execute the SpamAssassin utility sa-learn to consume the emails and update its detection mechanism. sa-learn will learn from messages that you specify as SPAM with the –spam switch and messages that are not SPAM with the –ham switch.

Open up a crontab shell and enter one or more of the below lines as required.

crontab -e

Crontab entries to teach SpamAssassin

Add one or more of the below lines to your crontab. Each entry is set to trigger every 24 hours at 0330 and log to /var/log/spam_train.log – both of these items can be changed as per your requirements. In addition, the mailbox location for these commands is set as /mailvol/jamescoyle.net/ and will need to be changed to match your email server environment.

There are a couple of other things to note with this process:

  1. Emails will only be learnt once. If you re-run the commands on the same emails they will not be learnt again.
  2. Emails will not be deleted from these folders so you’ll need to set up data retention rules.

Learn SPAM messages for a specific mailbox folder ‘Spam Training’

30 03 * * * L=/var/log/spam_train.log && echo `date` >> $L && sa-learn --spam --showdots /mailvol/jamescoyle.net/james.coyle/Maildir/.Spam\ Training/cur/ >> $L

Learn Ham messages for a specific mailbox folder ‘Spam Training’

30 03 * * * L=/var/log/spam_train.log && echo `date` >> $L && sa-learn --ham --showdots /mailvol/jamescoyle.net/james.coyle/Maildir/.Ham\ Training/cur/ >> $L

Search all users for a folder called ‘Spam Training’ and learn them as SPAM

Note: this could be process intensive for large mailboxes. 

30 03 * * * L=/var/log/spam_train.log && echo `date` >> $L && find /mailvol/jamescoyle.net/* -name '*Spam Training' -exec sa-learn --spam --showdots {}  >> $L \;


GlusterFS Error cannot open /dev/fuse

Category : How-to

Get Social!

After installing glusterfs-client on my Debian server I received the below error when trying to mount a remote GlusterFS volume. The error indicates that the device at /dev/fuse cannot be found, however ls showed that it was available.

This was the error displayed in the Gluster log after running the mount command:

[2016-04-12 17:39:58.948364] I [MSGID: 100030] [glusterfsd.c:2332:main] 0-/usr/sbin/glusterfs: Started running /usr/sbin/glusterfs version 3.7.10 (args: /usr/sbin/glusterfs --volfile-server=glustercluster1 --volfile-id=/data-volume /mnt/data-volume)
[2016-04-12 17:39:59.030349] E [mount.c:341:gf_fuse_mount] 0-glusterfs-fuse: cannot open /dev/fuse (No such device)
[2016-04-12 17:39:59.030385] E [MSGID: 101019] [xlator.c:433:xlator_init] 0-fuse: Initialization of volume 'fuse' failed, review your volfile again
[2016-04-12 17:43:29.644266] I [MSGID: 100030] [glusterfsd.c:2332:main] 0-/usr/sbin/glusterfs: Started running /usr/sbin/glusterfs version 3.7.10 (args: /usr/sbin/glusterfs --volfile-server=glustercluster1 --volfile-id=/data-volume /mnt/data-volume)
[2016-04-12 17:43:29.661947] E [mount.c:341:gf_fuse_mount] 0-glusterfs-fuse: cannot open /dev/fuse (No such device)
[2016-04-12 17:43:29.662014] E [MSGID: 101019] [xlator.c:433:xlator_init] 0-fuse: Initialization of volume 'fuse' failed, review your volfile again

A quick check of the kernel fuse module using modprobe gave an error:

modprobe fuse
ERROR: could not insert 'fuse': Unknown symbol in module, or unknown parameter (see dmesg)

And some Googleing indicated that it’s because fuse-utils was missing. In my case it wasn’t.

apt-get install fuse-utils

Further investigation showed that the kernel had recently been updated, but the machine hadn’t been restarted so the latest installed kernel wasn’t the kernel that was running. There seemed to be some kind of mismatch between the loaded kernel and the fuse library.

A reboot of the machine fixed the issue – the fuse module loaded correctly and the Gluster mount executed without error.

reboot

GlusterFS Error volume add-brick: failed: Pre Validation failed on BRICK is already part of a volume

Category : How-to

Get Social!

I received the below error today after I tried to add a ‘new’ brick to a GlusterFS volume. I’ve put the word ‘new’ into quotes because although the brick was new to the GlusterFS volume, the disk being added had been used as a brick before. The disk had all data removed from it, however somehow GlusterFS knew that the disk held some remnants of the previous brick.

The following command failed, trying to add the new brick:

gluster v add-brick data-volume replica 3 gluster3:/mnt/brick1/data

The error received:

volume add-brick: failed: Pre Validation failed on gluster3. /mnt/brick1/data is already part of a volume

Solution!

The solution is to use setfattr to clear the hidden filesystem attributes containing GlusterFS information about the bricks previous life. Run the following commands on the server that has the drive that you’re trying to add as a new brick.

setfattr -x trusted.glusterfs.volume-id /mnt/brick1/data
setfattr -x trusted.gfid /mnt/brick1/data

Of course, you should also ensure that the filesystem you’re adding is cleared, especially the .glusterfs hidden directory.

rm -rf /mnt/brick1/data/.glusterfs

And that’s it! Try running the add-brick command again, and you should be in business.

gluster v add-brick data-volume replica 3 gluster3:/mnt/brick1/data

GlusterFS Mount failed. Please check the log file for more details.

Category : How-to

Get Social!

gluster-orange-antYou may get the following error when trying to mount a GlusterFS volume locally. The error displayed gives no indication why the volume failed to mount, but it does hint at where you can get more information about the error.

This is the error presented when running the mount command:

Mount failed. Please check the log file for more details.

The log file could be in numerous places, depending on your Linux distribution and Gluster settings, however generally it will be in /var/log/glusterfs.

Take a look at the log file for further information on why the volume cannot be mounted. An example is included below, showing an issue with the fuse kernel module.

vi /var/log/glusterfs/mnt-data-volume.log
[2016-04-12 17:39:58.948364] I [MSGID: 100030] [glusterfsd.c:2332:main] 0-/usr/sbin/glusterfs: Started running /usr/sbin/glusterfs version 3.7.10 (args: /usr/sbin/glusterfs --volfile-server=glustercluster1 --volfile-id=/data-volume /mnt/data-volume)
[2016-04-12 17:39:59.030349] E [mount.c:341:gf_fuse_mount] 0-glusterfs-fuse: cannot open /dev/fuse (No such device)
[2016-04-12 17:39:59.030385] E [MSGID: 101019] [xlator.c:433:xlator_init] 0-fuse: Initialization of volume 'fuse' failed, review your volfile again
[2016-04-12 17:43:29.644266] I [MSGID: 100030] [glusterfsd.c:2332:main] 0-/usr/sbin/glusterfs: Started running /usr/sbin/glusterfs version 3.7.10 (args: /usr/sbin/glusterfs --volfile-server=glustercluster1 --volfile-id=/data-volume /mnt/data-volume)
[2016-04-12 17:43:29.661947] E [mount.c:341:gf_fuse_mount] 0-glusterfs-fuse: cannot open /dev/fuse (No such device)
[2016-04-12 17:43:29.662014] E [MSGID: 101019] [xlator.c:433:xlator_init] 0-fuse: Initialization of volume 'fuse' failed, review your volfile again

Your issue could vary, and as such we can’t cover every eventuality here. At least you now know how to get more details around your specific issue.


Visit our advertisers

Quick Poll

Do you use GlusterFS in your workplace?

Visit our advertisers