
Scripted Install of Oracle Java 8 on Ubuntu 16.04

Scripted Install of Oracle Java 8 on Ubuntu 16.04

Get Social!

Please see Install Oracle Java In Debian/ Ubuntu using apt-get for more information.

apt install -y software-properties-common
apt-add-repository -y ppa:webupd8team/java
apt update
echo oracle-java8-installer shared/accepted-oracle-license-v1-1 select true | /usr/bin/debconf-set-selections
apt install -y oracle-java8-installer


Manually downloading Java For Use With Webupd8’s apt-get Package

Category : How-to

Get Social!

java-logoOracle Java is one of the biggest problems in life. That’s just a fact. Half of it is the fact that you have to download it directly from Oracle each time, quarter of it is the almost daily updates (compounded by the first problem), and the remainder is dealing with the fact that the first problem is there by design.

Thankfully the boys and girls over at Webupd8 have created and maintain an apt-get deployed version of Oracle Java that handles initial setup and future updates. The apt package doesn’t actually contain the Oracle Java binaries, because that’s against Oracle’s TOC’s, but it contains a script that downloads it for you – all behind the scenes.

Sometimes Corporate networks block access to Oracle’s download servers and therefore block access to you installing Oracle Java by this method. Except…

You can manually download the JDK from Oracle and copy it to the required machine in the apt cache directory. When you then run the apt-get command the installer will realise that the tar.gz containing the Java binaries is available and won’t need to download it. You’ll still need the internet to download the apt package, but you won’t need to access oracle.com.

First off, make the relevant cache directory for use with your version of java. This example assumes Java 8.

mkdir /var/cache/oracle-jdk8-installer

Copy the latest version of Java into the above cache directory. This assumes that the download is in your current directory and is Java version 8 update 91.

cp jdk-8u91-linux-x64.tar.gz /var/cache/oracle-jdk8-installer/jdk-8u91-linux-x64.tar.gz

Finally install the required version of Java.

apt-get install oracle-java8-set-default

You’ll see the message Installing from local file as part of the installation indicating the installer hasn’t needed to download the Java binaries from Oracle.

Reading package lists... Done
Building dependency tree
Reading state information... Done
oracle-java8-set-default is already the newest version.
0 upgraded, 0 newly installed, 0 to remove and 3 not upgraded.
2 not fully installed or removed.
After this operation, 0 B of additional disk space will be used.
Do you want to continue? [Y/n] y
Setting up oracle-java8-installer (8u92+8u91arm-2~really8u91~webupd8~0) ...
Installing from local file /var/cache/oracle-jdk8-installer/jdk-8u91-linux-x64.tar.gz


DataStax Cassandra 3.2 Bash Install Script

Get Social!

The below script installs the DataStax distribution of Cassandra 3.2.x and the latest Oracle Java 8 on Debian. Copy and paste the script into a file called install_cassandra.sh and execute it as root.

Change the version 3.2 on line 12 to match the version you’d like to install.

#!/bin/bash
set -e

apt-get update
apt-get install -y wget curl

echo "Installing repos"
echo "deb http://ppa.launchpad.net/webupd8team/java/ubuntu xenial main" | tee /etc/apt/sources.list.d/webupd8team-java.list
echo "deb-src http://ppa.launchpad.net/webupd8team/java/ubuntu xenial main" | tee -a /etc/apt/sources.list.d/webupd8team-java.list
apt-key adv --keyserver hkp://keyserver.ubuntu.com:80 --recv-keys EEA14886

echo "deb http://debian.datastax.com/datastax-ddc 3.2 main" | tee -a /etc/apt/sources.list.d/cassandra.sources.list
curl -L https://debian.datastax.com/debian/repo_key | apt-key add -


echo "Installing binaries"
apt-get update
echo oracle-java7-installer shared/accepted-oracle-license-v1-1 select true | /usr/bin/debconf-set-selections
apt-get install -y oracle-java8-installer datastax-ddc

echo "Complete"

Then connect to the local Cassandra instance run the cqlsh tool.

cqlsh

Connected to Test Cluster at 127.0.0.1:9042.
[cqlsh 5.0.1 | Cassandra 3.2.1 | CQL spec 3.4.0 | Native protocol v4]
Use HELP for help.
cqlsh>


Install Oracle Java In Debian/ Ubuntu using apt-get

Category : How-to

Get Social!

java-logo

Oracle Java, due to Oracle’s license conditions, it quite a pain to install. The problem is that anyone who isn’t Oracle isn’t allowed to distribute the JDK binaries – they have to be downloaded strictly from Oracle. Luckily the guys over at webupd8team have been creative in this area and created and apt-get package that downloads the Java binaries from Oracle, presents the license agreement that you have to accept and and installs Java on the local machine.

Add Java Repository Using apt-add-repository on Ubuntu

We’ll use the apt-add-repository tool in this section to add the webupd8team’s ppa repository to our local apt package manager. This method should be used on Ubuntu – see the next section for Debian.

Before running the command, make sure you’ve got apt-add-repository installed as it’s often missing in the more minimal installations.

apt-get install software-properties-common

Older versions of Ubuntu (13.10 and older) would need a slightly different package:

apt-get install python-software-properties

Once you’ve got the package installed, go ahead and add the ppa Java repository and update your local apt cache with the new available packages.

apt-add-repository ppa:webupd8team/java
apt-get update

Add Java Repository Manually on Debian

If you’re using Debian or would like to manually add and maintain the list of repositories used by your apt installation then use the below commands.

echo "deb http://ppa.launchpad.net/webupd8team/java/ubuntu xenial main" | tee /etc/apt/sources.list.d/webupd8team-java.list
echo "deb-src http://ppa.launchpad.net/webupd8team/java/ubuntu xenial main" | tee -a /etc/apt/sources.list.d/webupd8team-java.list
apt-key adv --keyserver hkp://keyserver.ubuntu.com:80 --recv-keys EEA14886
apt-get update

This will create a new file containing the repository location in /etc/apt/sources.list.d/webupd8team-java.list


Installing Oracle Java

When using this method, the first step of the install process is to download the Oracle Java binaries from Oracle.com. You’ll then need to accept the license agreement and then the installation will begin.

You can automatically accept the license agreement, which is useful when scripting the install where it’s impossible to interact with the process. The first command in the following sections instructs the install to automatically accept the license agreement. If you’d like to read and manually accept the agreement then do not run the first line.

Choose your Java version:

Install Java 7

For Oracle JDK7 use:

echo oracle-java7-installer shared/accepted-oracle-license-v1-1 select true | /usr/bin/debconf-set-selections
apt-get install oracle-java7-installer

Install Java 8

For Oracle JDK8 use:

echo oracle-java8-installer shared/accepted-oracle-license-v1-1 select true | /usr/bin/debconf-set-selections
apt-get install oracle-java8-installer


Java Variables

Finally, you can set the Java variables automatically using another package provided by the webupd8team. Upgrading, say from Java 7 to Java 8 will automatically remove the predecessors package.

apt-get install oracle-java7-set-default

Or

apt-get install oracle-java8-set-default

Scripted Install

See the following for copy and paste scripts for installing:

Download Oracle Java From The Terminal With wget

Get Social!

java-logoOracle have a very restrictive license that applies to most of their software downloads which prohibits you from distributing the binaries yourself. What this means, for example, is that you could not download the Java binaries and upload them to your own APT repository for others to use.
There are a few workarounds that exist to help making this install easier, but here we’re going to look at downloading the Java runtime environment (JRE) binaries and installing them all from a command line.

Use wget to download the binaries, so make sure that’s available on your system. If it isn’t, simply apt-get install wget.

One of the important things to note is that the Java version changes over time and therefore the links and commands below may need to be changed to ensure you’re always getting the latest version. Check out the Java Download Page to make sure you have the latest.

wget --header "Cookie: oraclelicense=accept-securebackup-cookie" http://download.oracle.com/otn-pub/java/jdk/8u51-b16/server-jre-8u51-linux-x64.tar.gz

I’m using an minimal version of Debian that doesn’t have the worlds Certificate Authorities installed and therefore wget gives me an error:

ERROR: cannot verify edelivery.oracle.com's certificate, issued by '/C=US/O=GeoTrust, Inc./CN=GeoTrust SSL CA':
  Unable to locally verify the issuer's authority.
To connect to edelivery.oracle.com insecurely, use `--no-check-certificate'.

The fix is to either install the correct CA certificate on the machine or add the no-check-certificate switch to wget to avoid checking the certificate:

wget --no-check-certificate --header "Cookie: oraclelicense=accept-securebackup-cookie" http://download.oracle.com/otn-pub/java/jdk/8u51-b16/server-jre-8u51-linux-x64.tar.gz

Once you have the Java archive downloaded you’ll need to create a target folder and extract the downloaded archive with tar:

mkdir /opt/jre
tar -zxf server-jre-8u51-linux-x64.tar.gz -C /opt/jre

The last couple of steps are to tell your OS to use the Java binaries you’ve just moved into place.

update-alternatives --install /usr/bin/java java /opt/jre/jdk1.8.0_51/bin/java 1000
update-alternatives --install /usr/bin/javac javac /opt/jre/jdk1.8.0_51/bin/javac 1000

Running anything in Java, or using the -version switch should now use your newly installed binaries.

java -version
java version "1.8.0_51"
Java(TM) SE Runtime Environment (build 1.8.0_51-b16)
Java HotSpot(TM) 64-Bit Server VM (build 25.51-b03, mixed mode)


Install Grails from Git on Windows

Category : How-to

Get Social!

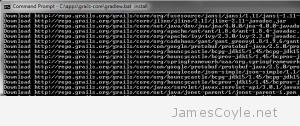
grails-core-gradlew.bat-installGood news: installing Grails from source is easy-peasey on Windows! Before you get started, you’ll need to have git and a JDK installed.

You can download both git and the JDK from the following locations:

Once these are both installed, set the JAVA_HOME variable from a command prompt. You’ll need to locate the exact java version which is in your Program Files\Java folder as it changes with each version.

set JAVA_HOME=C:\Program Files\Java\jdk1.7.0_25

Move to the folder where you would like to deploy Grails.

cd c:\apps\

And run the git clone command to start downloading the source.

git clone git://github.com/grails/grails-core.git

Move into the folder which was created with the git clone command.

cd grails-core

Finally run the install command which will download any further dependencies and compile the application.

gradlew.bat install

And that’s it! I told you it was easy.


Visit our advertisers

Quick Poll

Which type of virtualisation do you use?
  • Add your answer

Visit our advertisers