What is tmpfs?

What is tmpfs?

Category : Knowledge

Get Social!

Linux penguinA disk drive storage is usually persistent, that is, anything that is written to it will always be there exactly as it was written until it’s deleted or modified by an application. Power failures or computer restarts will not (for the most part) effect the data on the storage disk. You are limited in size by the capacity of the disk and the read and write speed will vary depending on the type of drive you have. Generally storage drives tend to be high in capacity and slow in speed.

Does that make sense? Good. tmpfs is nothing like that. tmpfs, as the name suggests, is intended to be for temporary storage that is very quick to read and write from and does not need to persist across operating system reboots. tmpfs is used in Linux for /run/var/run and /var/lock to provide very fast access for runtime data and lock files. It is also often used for /tmp however it’s not always recommended.

tmpfs uses a combination of computer RAM and disk based SWAP space to create a filesystem, such as EXT4, that the operating system can use. Because tmpfs is located in RAM, it’s very fast to read and write data to and from it, several times faster than an SSD. As your computer runs out of RAM, some of the data in tmpfs will be flushed to the systems SWAP storage on disk. This will dramatically decrease the speed that the tmpfs can be used, but stop your computer from receiving out of memory errors.

See my other blog post on tmpfs vs ramfs for more information on tmpfs and an alternative. Or jump straight to creating your own tmpfs mount point.

When Did my Linux Box Last Reboot/ Shutdown?

Get Social!

Linux penguinThe Linux command last can tell you when your Linux system last rebooted, shutdown, who logged in and any runlevel changes.

The utility parses the Linux log file  /var/log/wtmp which contains time stamped entries of these important system events.

The last command is usually installed on most Linux distributions by default and is usually ran as the root user.

Running last on it’s own will display system reboots and user logins with information such as dates, usernames and IP addresses.

last
root     pts/0        10.27.2.100      Thu May 28 00:29   still logged in
root     pts/1        10.27.2.100      Thu May 21 19:55 - 12:02 (5+16:06)
root     pts/0        10.27.2.100      Wed May 20 23:01 - 12:02 (6+13:00)
reboot   system boot  3.18.13+         Wed May 20 23:00 - 00:29 (7+01:29)
root     pts/2        10.27.2.100      Wed May 20 22:43 - down   (00:16)
root     pts/1        10.27.2.100      Wed May 20 16:40 - 16:40  (00:00)
root     pts/0        10.27.2.100      Mon May 18 09:07 - down  (2+13:53)

You can see in the above output that the operating system was last rebooted on the 20th of  May.

There are various switches you can apply to the last command to modify the output. The most common is-x to include runlevel changes and shutdown events in the output.

last -x
root     pts/0        10.27.2.100      Thu May 28 00:29   still logged in
root     pts/1        10.27.2.100      Thu May 21 19:55 - 12:02 (5+16:06)
root     pts/0        10.27.2.100      Wed May 20 23:01 - 12:02 (6+13:00)
runlevel (to lvl 2)   3.18.13+         Wed May 20 23:00 - 00:31 (7+01:30)
reboot   system boot  3.18.13+         Wed May 20 23:00 - 00:31 (7+01:30)
shutdown system down  3.18.7+          Wed May 20 23:00 - 23:00  (00:00)
runlevel (to lvl 6)   3.18.7+          Wed May 20 23:00 - 23:00  (00:00)
root     pts/2        10.27.2.100      Wed May 20 22:43 - down   (00:16)
root     pts/1        10.27.2.100      Wed May 20 16:40 - 16:40  (00:00)
root     pts/0        10.27.2.100      Mon May 18 09:07 - down  (2+13:53)

You can also use last to analyse a log file out of position, such as a logfile you’ve archived. Use the -f switch along with the log file path and name to read it’s data.

last -f /mnt/archive/webserver/wtmp
root     pts/0        10.27.2.100      Thu May 28 00:29   still logged in
root     pts/1        10.27.2.100      Thu May 21 19:55 - 12:02 (5+16:06)
root     pts/0        10.27.2.100      Wed May 20 23:01 - 12:02 (6+13:00)
reboot   system boot  3.18.13+         Wed May 20 23:00 - 00:35 (7+01:34)
root     pts/2        10.27.2.100      Wed May 20 22:43 - down   (00:16)
root     pts/1        10.27.2.100      Wed May 20 16:40 - 16:40  (00:00)
root     pts/0        10.27.2.100      Mon May 18 09:07 - down  (2+13:53)


Bash Script to Install a mariadb-galera-server Cluster on Multiple Servers

Get Social!

The following script will install the MariaDB Galera Server binaries on multiple servers with a basic cluster configuration.

Let me start by saying it’s a quick and dirty script – it may not work in all scenarios and was written on a set of Debian servers. Use it at your own risk! It may work on a MySQL Server cluster but you’ll have to remove or change the repository locations to the MySQL Server ones.

Before running the script you’ll need to have SSH key Authentication set up and working between all the nodes. See my post on Create ssh key authentication between nodes for setting up server key authentication.

You’ll also need to change a few variables in the script to match your environment.

The first variable IP is an array of all the IP addresses you’d like to use to install Maria DB Server. Currently there are 3 IPs specified – replace them with your own IP addresses and add any more if you have more than 3 servers.

The other two variables CLUSTER_NAME which is the name MariaDB will use for your cluster; and MAINT_USER_PASSWORD which is the password that will be set for the maintenance user.

#!/bin/bash

IP[0]=10.27.3.51
IP[1]=10.27.3.52
IP[2]=10.27.3.53
## IP[99]=10.10.10.10

CLUSTER_NAME=cluster_test
MAINT_USER_PASSWORD=OkVLGvp5qhM0eCNk

## DO NOT EDIT ##

CLUSTER_STRING="gcomm://"$(IFS=, ; echo "${IP[*]}")

for I in "${IP[@]}"
do :
	echo "Setting up repo for $I"
	ssh root@$I "apt-get update"
	ssh root@$I "apt-get upgrade -y"
	ssh root@$I "apt-get install -y software-properties-common"
	ssh root@$I "apt-key adv --recv-keys --keyserver hkp://keyserver.ubuntu.com:80 0xcbcb082a1bb943db"
	ssh root@$I "add-apt-repository 'deb http://lon1.mirrors.digitalocean.com/mariadb/repo/10.0/ubuntu trusty main'"
	
	echo "Installing DB for $I"
	ssh root@$I "apt-get update"
	ssh root@$I "apt-get install -y mariadb-galera-server rsync"
	
	ssh root@$I "echo '
[client]
host     = localhost
user     = debian-sys-maint
password = '$MAINT_USER_PASSWORD'
socket   = /var/run/mysqld/mysqld.sock
[mysql_upgrade]
host     = localhost
user     = debian-sys-maint
password = '$MAINT_USER_PASSWORD'
socket   = /var/run/mysqld/mysqld.sock
basedir  = /usr
' > /etc/mysql/debian.cnf"
	ssh root@$I "echo '
[mysqld]
query_cache_size=0
binlog_format=ROW
default-storage-engine=innodb
innodb_autoinc_lock_mode=2
query_cache_type=0
bind-address=0.0.0.0

# Galera Provider Configuration
wsrep_provider=/usr/lib/galera/libgalera_smm.so
#wsrep_provider_options="gcache.size=32G"

# Galera Cluster Configuration
wsrep_cluster_name=\"'$CLUSTER_NAME'\"
wsrep_cluster_address=\"'$CLUSTER_STRING'\"

# Galera Synchronization Congifuration
wsrep_sst_method=rsync
#wsrep_sst_auth=user:pass

# Galera Node Configuration
wsrep_node_address=\"'$IP'\"
wsrep_node_name=\"'$IP'\"' > /etc/mysql/conf.d/cluster.cnf"

done

ssh root@$IP "service mysql stop"
ssh root@$IP "service mysql start --wsrep-new-cluster"


Move Proxmox Container to Different Storage

Get Social!

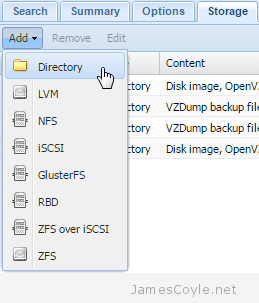
2015-03-05 00_18_04-Proxmox Virtual Environment storageA task often required when new storage is added or removed, and containers grow over time is to move a container onto another storage device.

The  Proxmox  Web GUI does not give us the ability to migrate a container from one storage device to another directly. To move a container onto different storage we have to take a backup of the container and restore it to the same ID with a different storage device specified. This can be time laborious when working with several containers.

The below script allows you to move an OpenVZ container from one storage device to another. The process requires that the container be stopped, which the script will handle.

Save the below script into a file called migrate.

vi migrate
#!/bin/bash
#
# Filename : migrate
# Description : Migrate Proxmox OpenVZ container from one storage to another
# Author : James Coyle
#
# Version:
# -Date       -Author      -Description
# 20-11-2013  James Coyle  Initial
#
#

# Variables
TMP=/tmp      #Location to use to create the backup for transferring to new storage. This needs to be big enough to store the backup archive for the container.

# Do not edit
usage() { 
	echo "Usage: $0" 
	echo "          [-c Required: Container ID to migrate <int>] "
	echo "          [-s Required: Target storage ID <string>]"
	echo "          [-d Optional: Delete the backup file after CT restoration <boolean>]"
	echo ""
	echo "Example: $0 -c 100 -s nasarray"
	echo ""
	exit 1; 
}

while getopts "c:s:d" o; do
  case "${o}" in
    c)
      CT=${OPTARG}
      ;;
    s)
      TARGET_STORAGE=${OPTARG}
      ;;
    d)
      DELETE=true
      ;;
    *)
      usage
      ;;
    esac
done
shift $((OPTIND-1))

# Check mandatory fields
if [ -z "${CT}" ] || [ -z "${TARGET_STORAGE}" ]; then
  usage
fi

RUNNING=false

set -e
set -o pipefail

echo "Moving $CT to $TARGET_STORAGE..."
if vzlist | fgrep -w -q " $CT "
then
    RUNNING=true
fi

if $RUNNING
then
    vzctl stop $CT
fi

vzdump --dumpdir $TMP $CT

ARCHIVE=$(ls -t $TMP/vzdump-openvz-$CT-*.tar | head -n 1)

vzrestore $ARCHIVE $CT -force -storage $TARGET_STORAGE

if $RUNNING
then
    vzctl start $CT
fi

if $DELETE
then
    LOG=$(ls -t $TMP/vzdump-openvz-$CT-*.log | head -n 1)
    echo "Deleting $LOG and $ARCHIVE"
    rm -rf $ARCHIVE $TMP/$LOG
fi

Set execution permissions on the script:

chmod + x migrate

The script has several parameters which are detailed below:

  • -d is specified if you would like the script to delete the temporary backup after the process has completed. Leave this out if you would like the backup tar file to be kept, just in case anything goes wrong.
  • -s is required to specify the name of the target storage. You can find this from the Proxmox Web GUI.
  • -c is required for the container ID to migrate.

In addition, the script contains the variable TMP. This will be the location of the backup tar created as part of the migration process and must contain enough space to store the content of the container being migrated. You can change this to suit your environment.

Example command:

./migrate -d -s newstorage -c 101


How to Kill a Process Based on Part of the Process Name

Category : How-to

Get Social!

This is a small, handy snippet to kill a Linux process based on matching a string from the ps command output.

For example, we may want to kill the mongodb process based on matching just the string mongo.

We would use the below command, consisting of ps and grep to get the process we would like to kill.

ps aux | grep mongo
mongodb   1025  0.7  7.9 5076284 39120 ?       Sl   Jul08  10:16 /usr/bin/mongod --config /etc/mongodb.conf
root     11873  0.0  0.1  11748   916 pts/0    S+   19:07   0:00 grep --color=auto mongo

We need to change the grep slightly, to stop the actual grep command process that we just ran from returning. We can add [] around part of the matching string to stop the process from being matched exactly as it will be parsed as a pattern, and not a literal string.

ps aux | grep mong[o]
mongodb   1025  0.7  7.9 5076284 39120 ?       Sl   Jul08  10:16 /usr/bin/mongod --config /etc/mongodb.conf

It doesn’t matter where on the string you add the brackets, as long as they are there somewhere.

Using awk we can now filter the results line to only print out the pid of the mongodb process.

ps aux | grep mong[o] | awk {'print$2'}
1025

Finally, we need to wrap all of this with the kill statement to remove the process. Be careful here as this will immediately kill the process with no warning or confirmation. This is just an example, it’s never a good idea to forcefully kill the mongodb process!

kill -9 `ps aux | grep mong[o] | awk {'print$2'}`

And that’s it, the mongodb process is dead!


Install the Splunk Forwarder on Ubuntu

Get Social!

splunkThe Splunk Universal Forwarder is a small, light weight daemon which forwards data to your main Splunk server from a variety of sources.

This guide assumes that you have already installed the Splunk server to receive the data.

Download the Splunk Universal Forwarder .deb file from the Splunk website:

Upload the file to your Ubuntu server and place it a temporary directory.

Run the dpkg command to install the Splunk server.  The file name of the .deb file may change as new versions are made available so make sure that you have downloaded.

dpkg -i splunkforwarder-6.0.3-204106-linux-2.6-amd64.deb

The output will look like the below. Once you see complete, the Splunk Forwarder installation will be complete.

Selecting previously unselected package splunkforwarder.
(Reading database ... 28352 files and directories currently installed.)
Unpacking splunkforwarder (from splunkforwarder-6.0.3-204106-linux-2.6-amd64.deb) ...
Setting up splunkforwarder (6.0.3-204106) ...
complete

Next we need to create the init.d script so that we can easily start and stop Splunk. Change the the Splunk directory and run the splunk executable with the below arguments.

cd /opt/splunkforwarder/bin/
./splunk enable boot-start

Press SPACE to view all of the license agreement and then Y to accept it.

You can now start the forwarder daemon using the init.d script.

service splunk start

See reading log files with the Splunk Forwarder to read your first log file and send the data to the Splunk server.


Visit our advertisers

Quick Poll

How many Proxmox servers do you work with?

Visit our advertisers