Proxmox 2.2 updates available

Proxmox 2.2 updates available

Category : Tech News

Get Social!

Proxmox 2.2 has some updates which have been pushed to the stable repository. There is no new functionality added with these updates, they are just bug fixes.

Reading the forum, there looks to be an issue with this update if you have turned off being able to login to SSH with passwords and enabled keys on your Proxmox host. It looks like the keys are removed and you will need to login to the local shell to re-create the keys. Updating a standard cluster works fine.

Before updating, make sure all your VM’s have been stopped. Run the below commands on each server in your cluster.

apt-get update
apt-get dist-upgrade

Restart all Proxmox servers to complete the installation.

For more information, visit the forum post on Proxmox.com.


Set I/O Priority for Proxmox/ OpenVZ Containers

Category : How-to

Get Social!

proxmox logo gradSince the 2.6.18-028stable021 kernel, it has been possible to set the I/O priority of an OpenVZ container. It is not currently possible to set any I/O limits for containers, only the priority. If you require I/O limits you should use KVM.
The higher the priority is for a container, the more time the container will have for using disks. You can choose between 0 – 7 inclusive, the default value is 4. The higher the value you use, the more I/O time your container will receive. Remember, as this is a priority system each container setting is relative to another. For example, if you set all your containers to priority 7, they will still receive the same amount of I/O time each.

To set the I/O priority of an OpenZV container, login to the host using the console and use the below command.

vzctl set [VM ID] --ioprio [Priority] --save

Replace [VM ID] with the ID of the container you would like to modify, and replace [Priority] with the priority value to use between 0 and 7. The below example sets the priority of container 200 to 7.

vzctl set 200 --ioprio 7 --save

You can also edit the config file directly. In Proxmox this is saved in /etc/pve/openvz/[VMID].conf

Add, or change the existing entry in the conf file to: IOPRIO=”[Priority]”

You will need to reboot the container for the changes to take effect.


How much disk space does Proxmox 2.x require?

Category : How-to

Get Social!

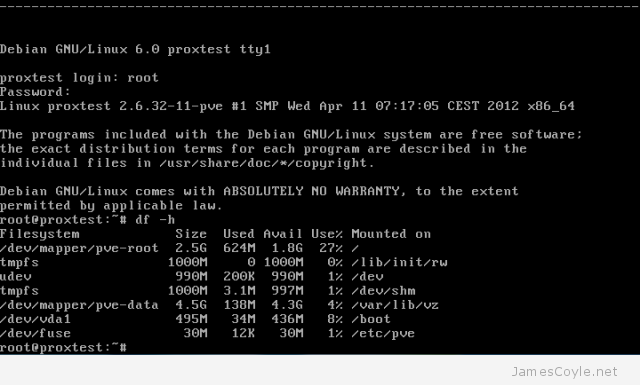
Proxmox can be installed on very little disk space. I tested Proxmox version 2.2 and installed it on a 10GB hard disk and Proxmox installed without an issue. On an earlier test, a 2GB hard disk was not sufficient and the installer showed an error.

The official webpage for Proxmox hardware requirements does not state a required or recommended size. I would suggest that more is better because each VM or OpenVZ container will be stored on your hard disk. If you have multiple hard disks, you should always put your OpenVZ containers and virtual disks on the fastest one. A common setup with just two disks is detailed below.

Disk A
  • Proxmox install
  • ISO images
  • OpenVZ templates
  • Backups
Disk B
  • OpenVZ containers
  • Virtual disks

This setup should reduce the time it takes to backup and create your OpenVZ containers and virtual machines as the reads and writes are on different disks. In addition it keeps your backups on a separate disk to the OpenVZ containers and virtual disks so if one disk fails, you will still have a copy.

For a test setup, two 250GB disks would be ample and enable you to try Proxmox and create multiple guests. For a production setup, the size of the disks would depend on the work load and volume of guests required. One thing is for sure though, faster is better. With SSD disks you will get the best performance with near zero seek time however they cost the most per gigabyte. For mechanical drives, use 15k rpm disks in a raid 0, or raid 10 for best speed and redundancy.


Proxmox 2.2 is now available

Category : Tech News

Get Social!

A new version of Proxmox is now available to download. If you are new to Proxmox you can download the 2.2 version ISO from http://www.proxmox.com/downloads/proxmox-ve/iso-images/132-proxmox-ve-2 or you can simply upgrade your existing Proxmox 2.1 install.

How to upgrade from Proxmox 2.x

Before upgrading to Poxmox 2.2, make sure all your VM’s have been stopped. Run the below commands on each server in your cluster.

apt-get update
apt-get dist-upgrade

Restart all Proxmox servers to complete the installation.

New features of Proxmox 2.2 include:

  • Support for up to 32 KVM network adapters
  • Live snapshot support for KVM images
  • Updated qemu-kvm to 1.2.0
  • New PVE Kernel 2.6.32-042
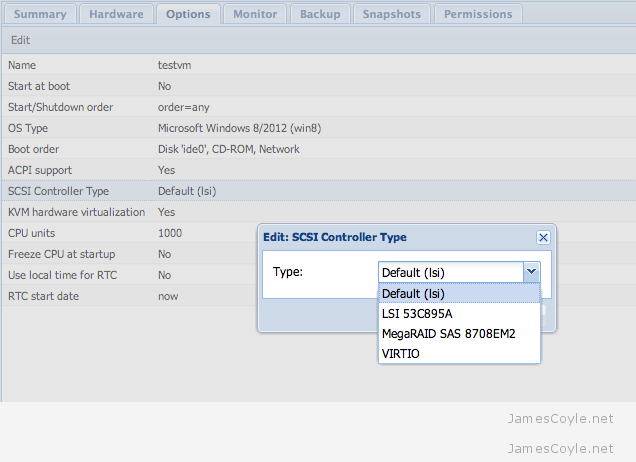
  • New option for SCSI controller in KVM

You can see the full change log at http://pve.proxmox.com/wiki/Roadmap#Proxmox_VE_2.2

Take a look at the below screenshots for some of the visible changes.

SCSI hardware selection:

Snapshot manager


Proxmox OpenVZ CPU units

Tags :

Category : How-to

Get Social!

openvz-logo-150px_new_3OpenVZ containers have a mechanism in place to prioritise CPU resource assignment. You can make sure that your most critical guests have the CPU resource they require.
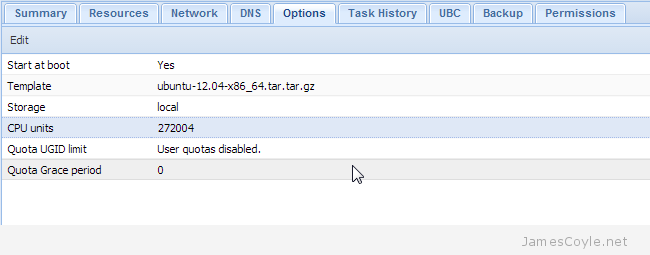
In Proxmox you can set the CPU units attribute through the web GUI by clicking on the container to change, selecting the Options tab and double clicking CPU units.

This setting dictates the minimum amount of CPU time, or CPU units, the guest will have. Before you change the setting you will need to find out how many CPU units your system has available. Run vzcpucheck to find out how many CPU units you have available.

Power of the node: 1360020 indicates the maximum CPU units your system has available for use. You can now distribute these CPU units to your guests however, this setting should be used as a minimum amount of CPU time your guest will have. The guest will only use the allocated resource if it needs it, otherwise will be available for other guests.

For example, if you wanted to give a container 20% of the total CPU time, you would would enter 272004.

1360020 * 20% = 272004
(Total units) * (desired %)

This value can be entered into the Proxmox web GUI under Options on the container screen.

proxmox cpu units

If you prefer the command line, on the host you can use the vzctl set command:

vzctl set 101 --cpuunits 272004 --save

Visit our advertisers

Quick Poll

What type of VPN protocol do you use?

Visit our advertisers