Login to Proxmox web GUI

Login to Proxmox web GUI

Tags :

Category : How-to

Get Social!

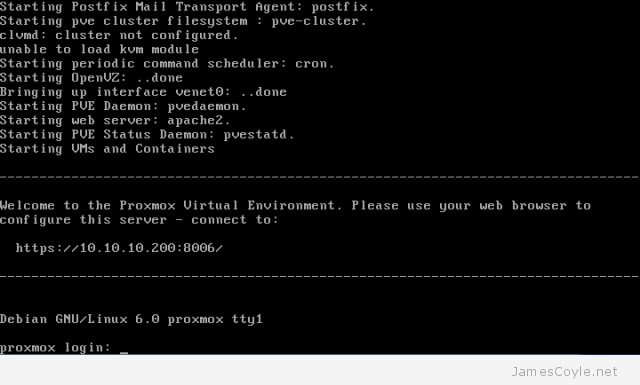
You can access the Proxmox web GUI from a web browser using the https protocol, your Proxmox server IP or hostname and the default port 8006 (https://[proxmox-server-ip]:8006).

Example: https://10.10.10.200:8006

If you are not sure of your Proxmox server IP, you can view the screen of your host server shortly after boot where your IP will be displayed.

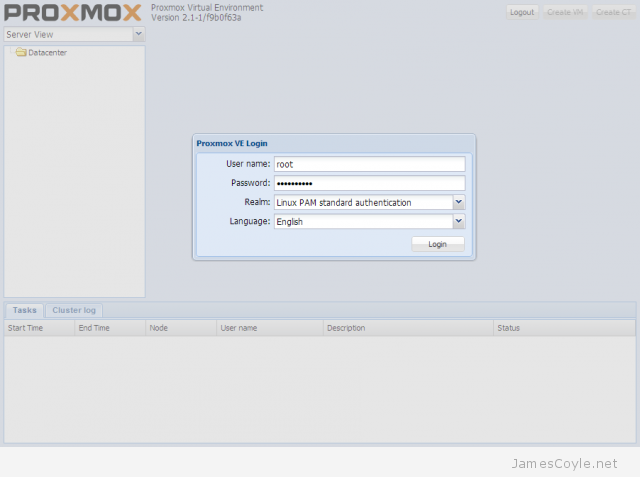
Enter root as the User name and the Password which you entered during the install.


Add test repository to Proxmox

Category : How-to

Get Social!

Proxmox has a test repository (repo) which can be used to deliver the latest software and updates using apt-get or aptitude.

This repo contains test software which the Proxmox dev team are currently working on and as such may contain bugs, be feature incomplete or contain security vulnerabilities. This is not recommended for production Proxmox servers and should be kept to your development/ test servers.

Login to your Proxmox console as root either using the web GUI console or directly via ssh.

Using vi, edit the apt sources file

vi /etc/apt/sources.list

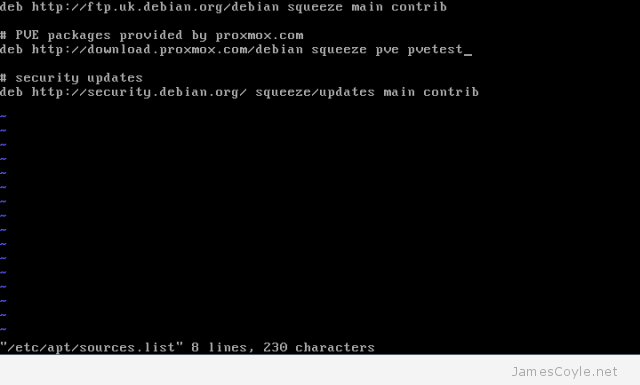
Find the line which contains deb http://download.proxmox.com/debian squeeze pve and append pvetest so that it looks like the below image.
 

Run the following command to update apt-get with the latest repository

aptitude update

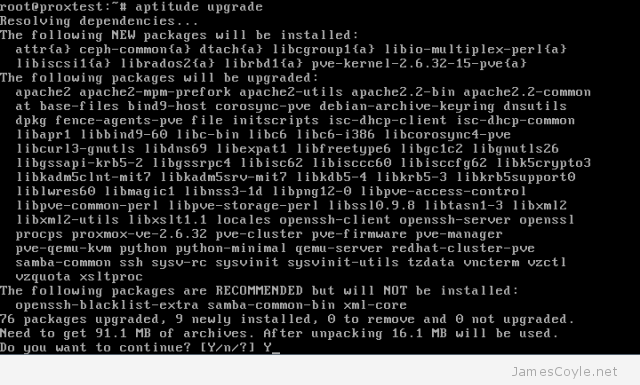
And finally to upgrade your system to the latest test version, run the upgrade command and type y.

aptitude upgrade
To remove the pvetest repository, simply edit the /etc/apt/sources.list file and remove the pvetest repo which you just added. Then run aptitude update.

Setup Active Directory Authentication in Proxmox 2

Category : How-to

Get Social!

Proxmox 2 makes setting up AD authentication simple if you have the AD server names. AD only provides the authentication and does not import or automatically create each user. You will still need to add each user to Proxmox before they can login.

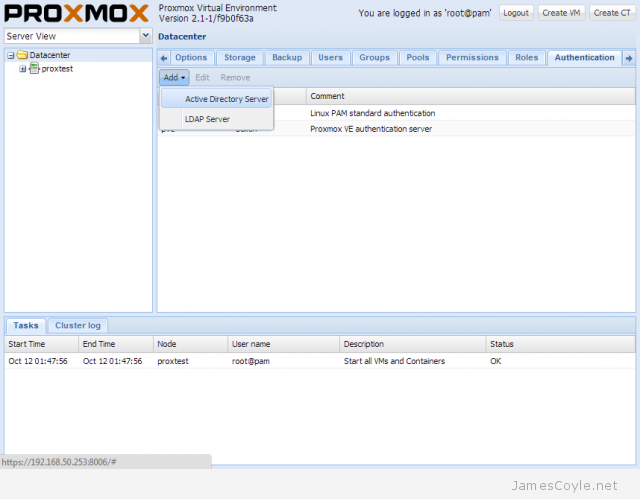
Click on the Datacenter folder on the left hand side and click Authentication. Click Add and then Active Directory Server.

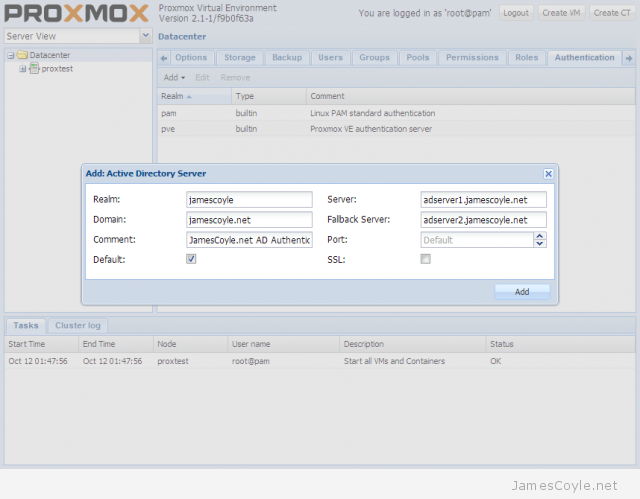
Enter the following details into the Add: Active Directory Server dialogue box and click Add.

  • Realm: the name to use for this authentication server.
  • Domain: AD domain name which holds the users which will be used for authentication.
  • Comment: optional attribute – note this will show up on the main login dialogue box.
  • Default: tick to make this the default authentication method.
  • Server: AD server IP or hostname
  • Fallback Server: secondary AD server IP or hostname
  • Port: keep as Default unless your AD server port has changed.
  • SSL: keep unticked unless you require SSL communication to the AD server.

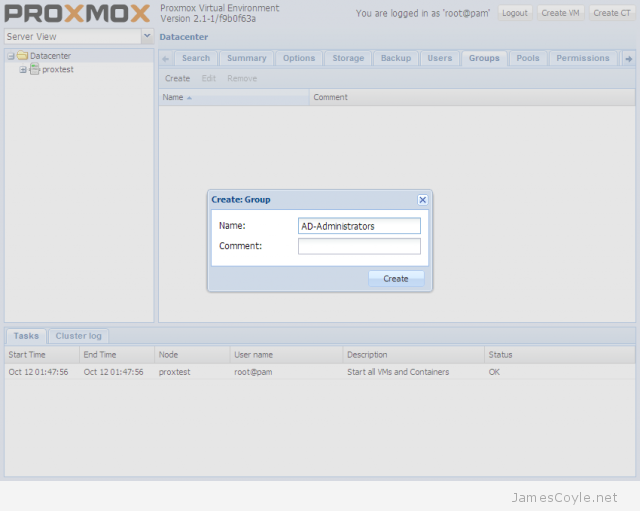
Click the Groups tab and then Create to create a new group on your proxmox server for your AD users. Enter a Name for this group and click Create.

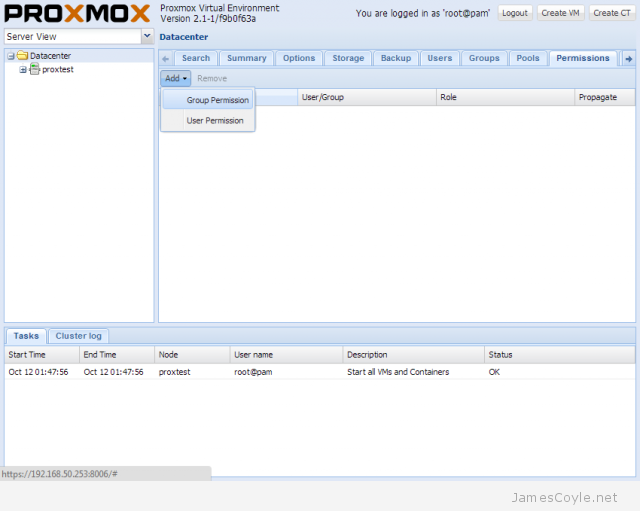
Click the Permissions tab, then click Add and Group Permission.

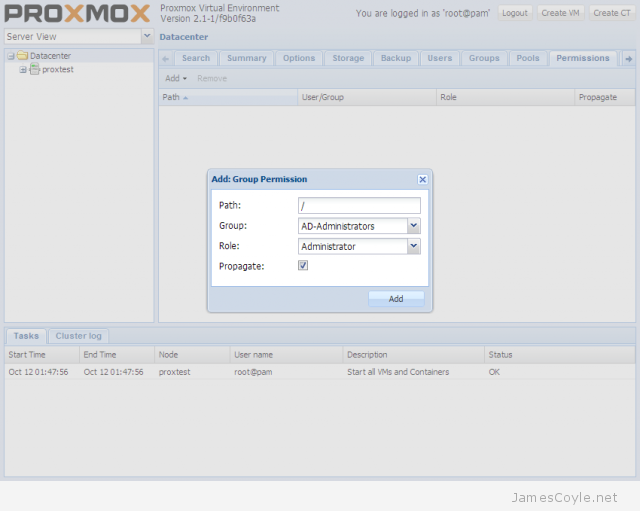
Enter the settings as per below and click Add.

  • Path: the path on the server tree which this group can access. ‘/’ is the top of the hierarchy and can therefore access the full server.
  • Group: the group you created in the previous step.
  • Role: the role, or access level users of this group will have.
  • Propagate: use these permissions for any child objects.

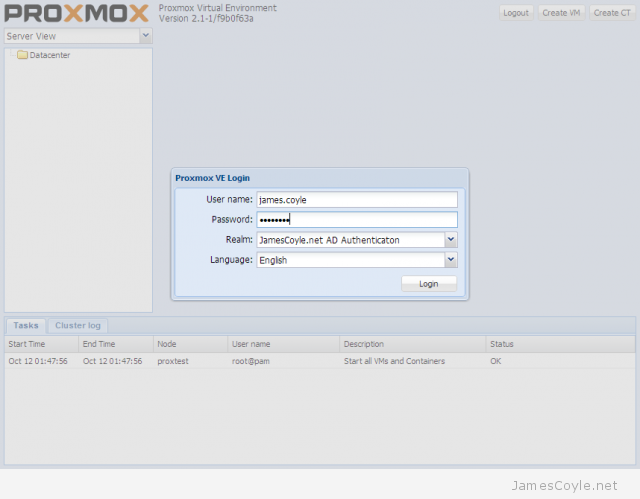
You can now Logout and log back in as an Active Directory user. Make sure your Realm is set to the Realm you created in the first steps of this tutorial.

If you need to log back in without AD, set your login Realm to Linux PAM standard authentication.


Visit our advertisers

Quick Poll

How many Proxmox servers do you work with?

Visit our advertisers