Proxmox 3.1 is now available!

Proxmox 3.1 is now available!

Get Social!

proxmox logo gradA new release of Proxmox is now available, release 3.1.

The highlights of this new release are:

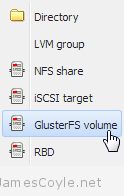
  • A new storage plugin for GlusterFS.

Proxmox storage typesThis is a new storage plugin which can be used to add usable storage to your Proxmox host. GlusterFS is an open source, distributed file system with potential to house a huge capacity of data.

GlusterFS is key to open source, scalable and highly available storage spanning many servers, and even data centres.

See their About page for more information: http://www.gluster.org/about/

  • The SPICE protocol has been implemented as a technology preview. Whilts it is not recommended for production systems, you can see what’s in store in the Proxmox roadmap.
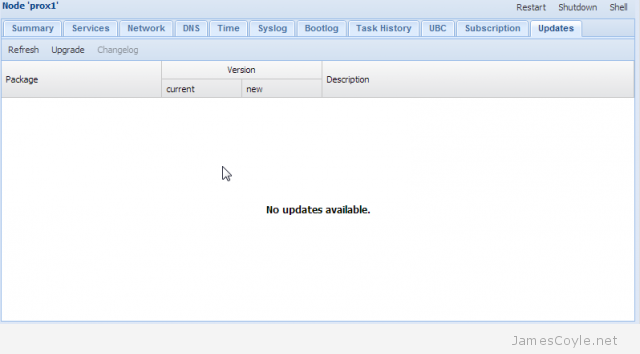
  • One of the most dramatic changes of Proxmox 3.1 is that the package repositories have been split into subscription and none-subscription. The subscription repository is the only repository recommended for a production server, however it requires a paid subscription with Proxmox to access it. See this thread for more information on the new Updates GUI page.

Proxmox updates manager

You can update any 3.0 install of Proxmox to the latest 3.1. Before updating, make sure all your VM’s have been stopped. Run the below commands on each server in your cluster.

apt-get update
apt-get dist-upgrade

Restart all Proxmox servers to complete the update.


Enable Proxmox installation debugger

Get Social!

Although installations of Proxmox usually go smoothly, sometimes you may have problems detecting storage arrays or other hardware. By default the installer doesn’t give much away about any problems, so in the event of a problem you need to enable debugging.

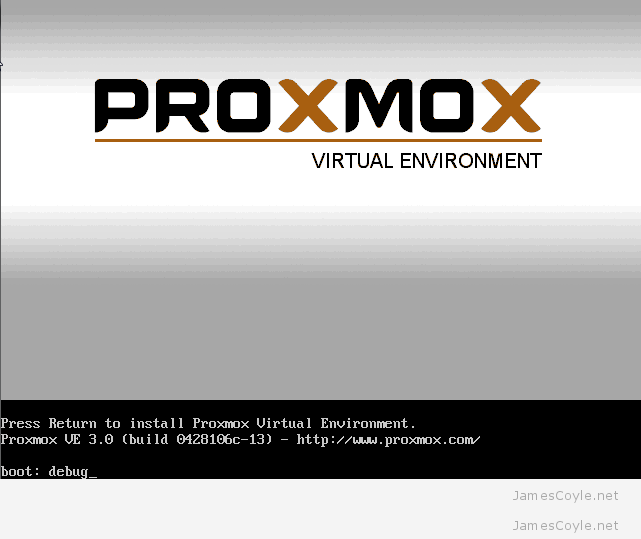
To enable debugging, you will need to type debug at the installation boot menu.

Proxmox boot install screen debug

You can mix this with other arguments to over ride the defaults. See Advanced install settings for more information.

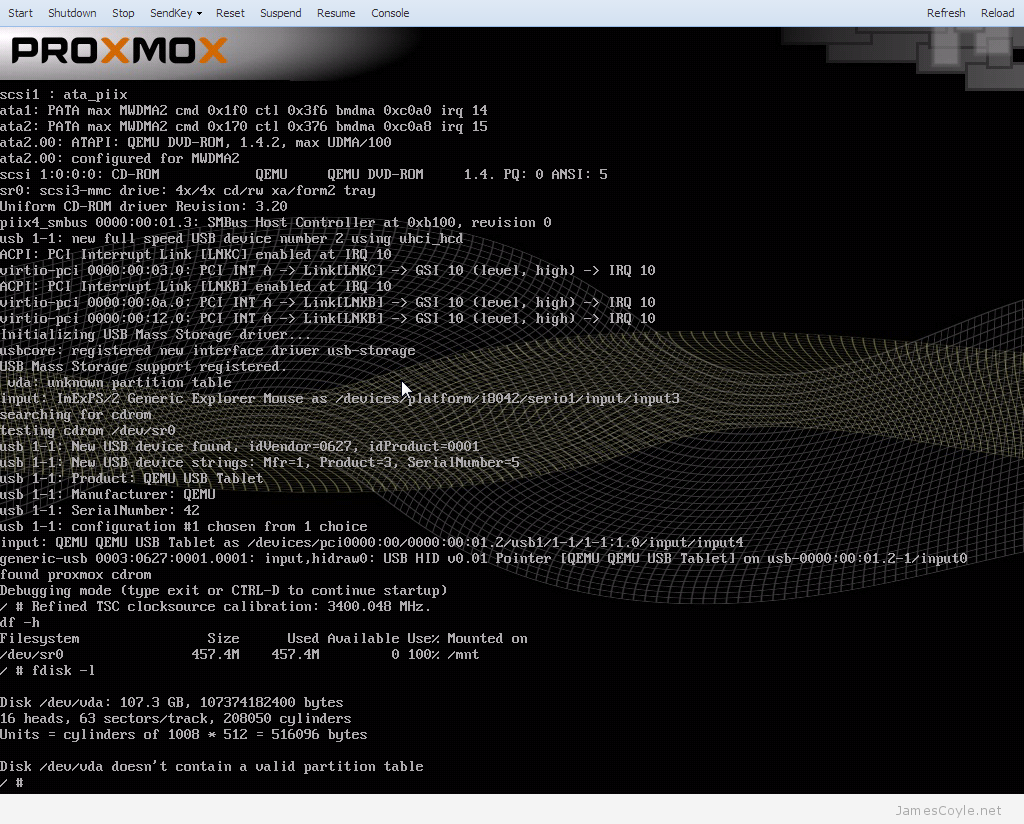
You will then be taken to a console where you can run any pre diagnostic commands. Press CTRL + D to continue the installation once you have finished with the terminal. If the installer errors, click Abort to return to a console.

Proxmox boot install screen debug console


Proxmox advanced install settings

Get Social!

proxmox logo gradInstalling Proxmox is quick and easy – the installer GUI takes care of everything, such as installing the correct packages and partitioning the root hard disk.

You can download Proxmox from the Proxmox download page as an ISO which you will need to boot your server from.

See my  Install guide blog post for the basics on installing Proxmox.

On more advanced installs, there may be a need to override some of these options. For example, you may want to specify how much swap space is created, or the size of the root partition. On one of my installs using a 120GB disk as the install device, 28GB is used for my root (/) partition on a default install. As I only run the basic, required packages on the host this size is far too large. With larger disks the problem gets worse.

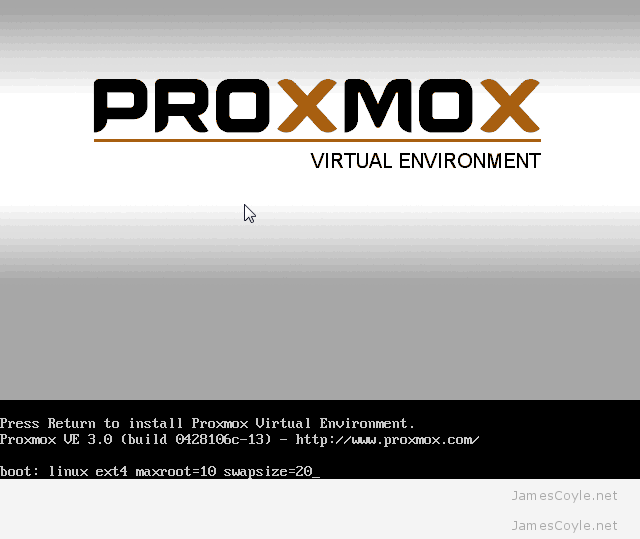
When installing proxmox, the first screen of the installer is the Boot menu. At this prompt, we can specify arguments to override the defaults.

Proxmox boot install screen

The above example linux ext4 maxroot=10 swapsize=20 sets the partition format to ext4 (ext3 is the default), creates a root partition of 10GB providing the disk is large enough and swapsize of 20GB.

The options available at the boot menu are:

  • linux ext4 – sets the partition format to ext4. The default is ext3.
  • hdsize=nGB – this sets the total amount of hard disk to use for the Proxmox installation. This should be smaller than your disk size.
  • maxroot=nGB – sets the maximum size to use for the root partition. This is the max size so if the disk is too small, the partition may be smaller than this.
  • swapsize=nGB – sets the swap partition size in gigabytes.
  • maxvz-nGB – sets the maximum size in gigabytes that the data partition will be. Again, this is similar to maxroot and the final partition size may be smaller.
  • minfree=nGB – sets the amount of free space to remain on the disk after the Proxmox instillation.

Proxmox 3.0 is now available – with updates!

Category : Tech News

Get Social!

proxmox logo gradThe guys building Proxmox have not been messing about; in the past couple of weeks we have seen a major release of Proxmox V3.0 and a few updates. We now have qemu templates which we can clone as many times as required, as a whole new guest or a thinly provisioned guest linked to the clone. With the latest updates we now have storage migration which enables us to move a qemu guests storage to a new storage type.

You can download the ISO from http://www.proxmox.com/downloads/proxmox-ve/17-iso-images

Highlights of the 3.0 release:

  • Based on Debian 7.0 (Wheezy)
  • new VM clone feature
  • new event driven API server (pveproxy)
    • completely replace apache2
    • efficient support for HTTP keep-alive
  • support bootlogd (boot log can be viewed on the GUI)
  • update qemu-kvm to 1.4.1

And the recent update:

  • Storage migration 

There is an upgrade script to upgrade from version 2.3 to 3 however as the new version is now based on Debian 7.0 instead of Debian 6. To make sure there are no left over packages or files floating around, I would recommend a fresh install of Proxmox version 3.0.

Don’t forget to update once you have installed Proxmox 3.0 with apt-get by using the below commands in a terminal. Before updating, make sure all your VM’s have been stopped. Run the below commands on each server in your cluster.

apt-get update
apt-get dist-upgrade

Restart all Proxmox servers to complete the installation.

If you would like to try the in-place upgrade path, see the Proxmox Wiki for more information.


Reclaim disk space from a sparse image file (qcow2/ vmdk)

Get Social!

western-digital-diskSparse disk image formats such as qcow2 only consume the physical disk space which they need. For example, if a guest is given a qcow2 image with a size of 100GB but has only written to 10GB then only 10GB of physical disk space will be used. There is some slight overhead associated, so the above example may not be strictly true, but you get the idea.

Sparse disk image files allow you to over allocate virtual disk space – this means that you could allocate 5 virtual machines 100GB of disk space, even if you only have 300GB of physical disk space. If all the guests need 100% of their 100GB disk space then you will have a problem. If you use over allocation of disk space you will need to monitor the physical disk usage very carefully.

There is another problem with sparse disk formats, they don’t automatically shrink. Let’s say you fill 100GB of a sparse disk (we know this will roughly consume 100GB of physical disk space) and then delete some files so that you are only using 50GB. The physical disk space used should be 50GB, right? Wrong. Because the disk image doesn’t shrink, it will always be 100GB on the file system even if the guest is now using less. The below steps will detail how to get round this issue.

On Linux

We need to fill the disk of the guest with zero’s (or any other character) so that the disk image can be re-compressed.

In a terminal, run the below command until you run out of disk space. Before running this, be sure to stop any applications running on the guest otherwise errors may result.

dd if=/dev/zero of=/mytempfile

Once the command errors out (this may take a while depending on your disk image size and physical disk speed) delete the file.

rm -f /mytempfile

Shutdown the guest and follow the steps below under All OS’s.

On Windows

You will need to download a tool called sdelete from Microsoft which is will fill the entire disk with zeros which can be re-compressed later.

Download: http://technet.microsoft.com/en-gb/sysinternals/bb897443.aspx

Once you have downloaded and extracted sdelete, open up a command prompt and enter the following. This assumes that sdelete was extracted into c:\ and c:\ is the disk you would like to use to reclaim space

c:\sdelete.exe -z c:

Once this completes (this may take a while depending on your disk image size and physical disk speed), shutdown the guest and follow the below steps under All OS’s.

All OS’s

The rest of the process is done on the host so open up a terminal window and SSH to your Proxmox host. Move to the directory where the disk image is stored and run the below commands.

Make sure you have shut down the virtual machine which is using the qcow2 image file before running the below commands.

mv original_image.qcow2 original_image.qcow2_backup
qemu-img convert -O qcow2 original_image.qcow2_backup original_image.qcow2

The above commands move the original image file, and then re-compress it to it’s original name. This will shrink the qcow2 image to consume less physical disk space.

You can now start the guest and check that everything is in working order. If it is, you can remove the original_image.qcow2_backup file.


Proxmox 3.0 RC2 is now available!

Get Social!

Proxmox 3.0 RC2 has been released for download. Whilst is is not supported or recommended for production, it’s a good idea to get to grips with the new features and feed any bugs back to the Proxmox team.

You can download the ISO from http://www.proxmox.com/downloads/proxmox-ve/17-iso-images

Highlights of the 3.0 release:

  • Based on Debian 7.0 (Wheezy)
  • new VM clone feature
  • new event driven API server (pveproxy)
    • completely replace apache2
    • efficient support for HTTP keep-alive
  • support bootlogd (boot log can be viewed on the GUI)
  • update qemu-kvm to 1.4.1

For more information, check out the forum thread: http://forum.proxmox.com/threads/13815-Proxmox-VE-3-0-RC2-released!


Visit our advertisers

Quick Poll

Which type of virtualisation do you use?
  • Add your answer

Visit our advertisers