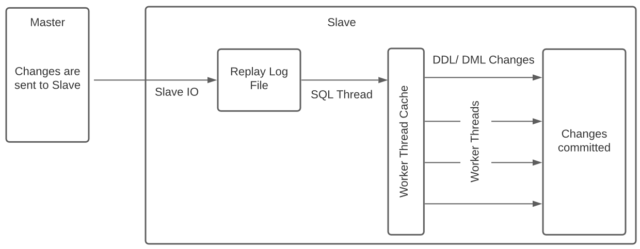
 The MySQL server can replicate a database over TCP to another instance of MySQL to provide a near real time backup for data redundancy. This process is not to be confused with MySQL working in a cluster to share workload and provide high availability. I’ll cover clustering in a later blog post.
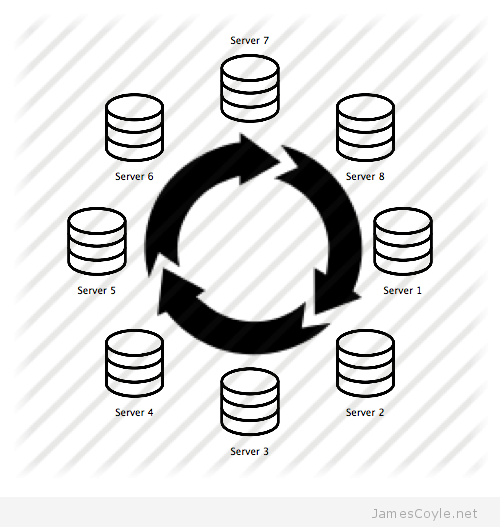
MySQL uses a master and slave scenario where the master is where the changes are detected and the slave is where the changes are sent to. This means that changes are only replicated one-way and any changes on the slave will not be replicated on the master. To get round this, you can set up each server as a slave and as a master so that changes are sent both ways. This is called circular replication.
To set up one way replication this post will assume that you have MySQL installed on two servers, one the master and one the slave. If you have not installed MySQL server you can install it on Debian/ Ubuntu with apt-get.
apt-get install mysql-server
The below instructions must be executed on the correct server, either master or slave. Be careful that you are executing the right command on the right server!
MySQL Replication Mode
Before we get into setting up our replication server we need to consider the replication mode to use. There are two types of replication mode, or a third if you include the combination of the two.
- Statement based replication is where each statement that is sent to the master is also sent to the slave. This means that, in most scenarios, the data will be the same on each server as the same statements have been executed on each server.
- Row based replication is where each change to a row in a table on the master server is written to a log and sent to the slave. The slave server then updates the required rows with the literal data.
- Mixed is a combination of the two – the MySQL server chooses which mode to use based on the task being performed.
Configure MySQL Replication
Replication, in this example, is done at a database level and changes will be replicated in one direction from master to slave. This means that any changes made to the slave will not appear on the master.
Master
The below changes should be made on the master MySQL server. A slightly different set of steps will be detailed below for the slave.
Open the my.cnf MySQL configuration file and make the following changes:
vi /etc/my.cnf
Find the bind-address attribute and change it to the IP address of the master server. You can find your IP address by using ifconfig if you are not sure what it is.
bind-address = 10.1.1.100
Find or add the server-id attribute and make sure it’s uncommented. You need to assign your master server an ID, let’s use 1 for our master server.
server-id = 1
Find or add the log_bin attribute and make sure it’s uncommented. This is the location where your master server will write all the changes that occur on the database.
log_bin = /var/log/mysql/mysql-bin.log
Add an entry to specify which MySQL database should be included for replication.
binlog_do_db = replication_database
You can add as many databases as you like by repeating the binlog_do_db attribute. For example:
binlog_do_db = replication_database1
binlog_do_db = replication_database2
The next step is to create a user which has the appropriate permission to use the MySQL replication features. Log in to MySQL with the below command, followed by your root MySQL user password.
mysql -u root -p
Create a new user which will be used to connect to the master instance from the slave to transfer the replication data.
GRANT REPLICATION SLAVE ON *.* TO 'mysql_rep'@'%' IDENTIFIED BY '[PASSWORD]';
The above example of granting privileges and creating a user are the easiest to get working but are the least secure. You may need to change this to meet your security requirements. You’ll also need to replace [PASSWORD] with the password you would like to use for the mysql_rep user.
Now lets create the database that will be replicated to our slave server. It’s important that after creating the database that nothing is changed until replication has been completely set up. If you already have a database then you will need to export the database, with all it’s data, and import it into the slave before completing the replication setup. This is because both databases must be in the same state for replication to keep everything in sync.
create database replication_database;
Type quit to exit the MySQL client and restart the MySQL server.
service mysql restart
At this point, we can check that the server is set up to write changes to the log file. Log back into MySQL Server Client and issue the below SHOW command.
mysql -u root -p

SHOW MASTER STATUS;
The output should be similar to the below, and indicates that the master is configured to log the changes.

And that should be your master MySQL server configured! Onto the slave…
Slave
The slave configuration is very similar to the master, however there are subtle differences.
Open the my.cnf MySQL configuration file and make the following changes:
vi /etc/my.cnf
Find the bind-address attribute and change it to the IP address of the master server. You can find your IP address by using ifconfig if you are not sure what it is.
bind-address = 10.1.1.200
Find or add the server-id attribute and make sure it’s uncommented. You need to assign your slave server an ID, let’s use 2 for our slave server. Keep in mind that this has to be unique across your replication environment so you must change it from the default of 1 that will likely be in the file already.
server-id = 2
Find or add the log_bin attribute and make sure it’s uncommented. This is the location where your slave server will write all the changes that occur on the database. In addition to the log_bin you’ll also need a relay-log file on your slave.
log_bin = /var/log/mysql/mysql-bin.log
relay-log = /var/log/mysql/mysql-relay-bin.log
Add an entry to specify which MySQL database should be included for replication.
binlog_do_db = replication_database
Save the file and restart the MySQL server.
service mysql restart
We now need to tell the slave server where it can find the master server. Log into MySQL Server Client as the root user.
mysql -u root -p
Run the following command, and substitute your values as below.
- MASTER_HOST is the IP address of your master server.
- MASTER_USER is the user on the master that the slave should use to connect.
- MASTER_PASSWORD is the password for the above user on the master server
- MASTER_LOG_FILE is the logfile name on the master server that will be used for replication. This was displayed in the image above when running the command SHOW MASTER STATUS.
- MASTER_LOG_POS is the location within the log file that your slave should start replicating from. The log position is also displayed with the SHOW MASTER STATUS command. Note, this will increase as changes are made to your master database.
CHANGE MASTER TO MASTER_HOST='10.1.1.100',
MASTER_USER='mysql_rep',
MASTER_PASSWORD='[PASSWORD]',
MASTER_LOG_FILE='mysql-bin.000001',
MASTER_LOG_POS=  107;
The final steps are to start our slave, from which point any changes made to the master will be replicated, and check the status.
Execute the below to start replication:
START SLAVE;
And finally show the status of the slave replication to make sure everything is working.
SHOW SLAVE STATUS;
If you now make some changes on your master server, they should be immediately replicated to the slave. After making some changes, run the SHOW SLAVE STATUS command again and you should notice that the Position value has incremented.
You should be aware that almost any changes are replicated – new tables, indexes and changes in data will all be replicated in the same way.


 I spoke about
