Windows Has Symbolic Links And It’s Called mklink

Windows Has Symbolic Links And It’s Called mklink

Get Social!

A symbolic Link is a reference to a file which is stored in another location to make a file or folder accessible from that location. For example, if you have a directory in c:\Users\James and wanted to make that accessible from c:\James you could create a symbolic link of c:\Users\James to the location c:\James which would mean anything stored in c:\Users\James such as test.txt would be accissible from c:\James\test.txt.

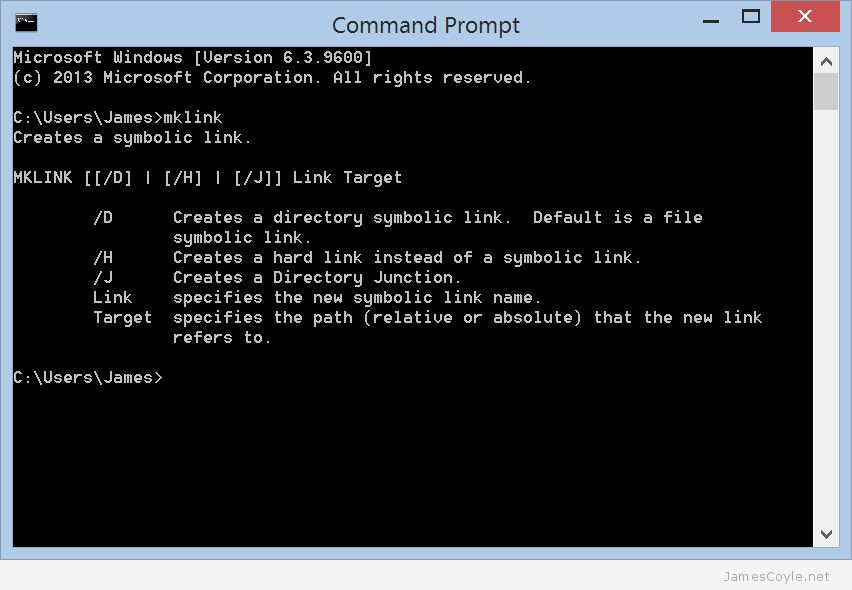
This has been available in Linux since the dawn of time and is one of the common file system functions. It’s used as standard by Apache2 on Ubuntu to enable or disable site config files. What you might not know, however, is that symlinks are available on Windows and have been for some time. In Windows symlinks are created using a command line application called mklink.
mklink-command-prompt

A link works exactly like the object is actually in that location; it’ll show in Windows Explorer, and CMD prompt and all Save As dialogues.

Create an mklink

To create a directory link you’ll need to open a command prompt and use the mklink command as below with your values substituted.

mklink /j [linkname] [target]
  • [linkname] is the new object that will be created on the file system to point to your [target] location.
  • [target] is the file system location of the file or directory that you would like to link to.

You can think of this process in a similar way to creating a Windows shortcut. The [linkname] is the place you will save your shortcut and the [target] is the place your shortcut will take you when you double click it. Remember an mklink is not the same as a shortcut because an mklink will make the target location look like it’s physically available at the link location where a shortcut will simply send you to the target location when clicked.

Delete an mklink
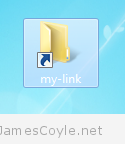
mklink-folder-exampleChecking if a folder is a link or a regular file system object is quite easy. If you look at it in Windows Explorer will show a small arrow on the icon, much like a shortcut, or you can look at it using dir in a Command Prompt similar to below:

c:\Users\James>dir

14/07/2015  19:37  <JUNCTION> my-link [C:\Users\James\Desktop\my-link-source]

You can see that the directory link called my-link is referenced as <JUNCTION>.

Deleting the mklink is then done in the same way as deleting any other filesystem object – simply delete it using Windows Explorer.

Create a RAM Disk in Windows

Category : How-to

Get Social!

ImDisk-Virtual-Disk-DriverI’ve been using RAM disks within Linux for quite some time now and I’ve blogged about it with the ramfs and tmpfs file systems. I’m not going to go over the details of a RAM disk again as the principle is the same on whichever operating system you choose; you set aside a portion of RAM to use as a file system.
Currently I’m using Windows 7 at work instead of my usual Linux based OS’s and so my usual out of the box mounting of a RAM Disk simply won’t work. After a spot of Googling I came across ImDisk which promises to be an Open Source Windows Virtual Disk driver (as well as a few other things). I’m not plugging ImDisk specifically, but they do seem to do what I’m after – create a virtual Disk that I can use as a file system.

Installing ImDisk

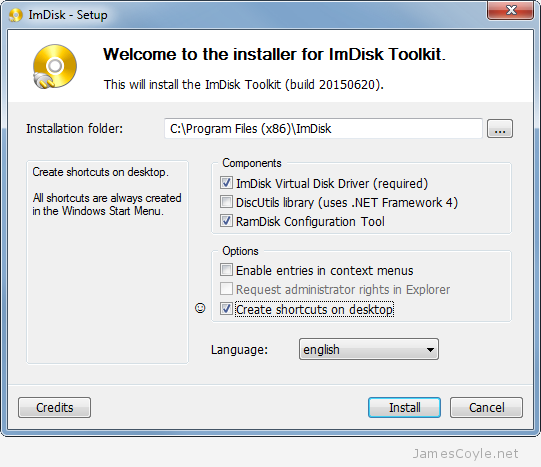
Installation was quick and easy – simply download the binary from the website and give the .exe two little clicks.

ram-disk-ImDisk-Setup

I disabled a couple of things on the installer because I only want to use it as a RAM Disk driver.

ram-disk-ImDisk-desktop-iconsOnce the installation completes you’ll have two shortcuts on your desktop – that’s assuming you didn’t un-tick them during the installation!

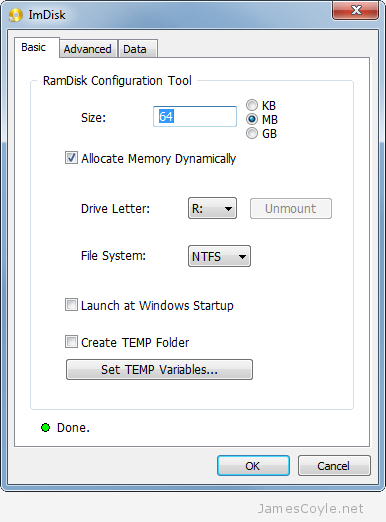
Double click on RamDisk Configuration to create your first Windows RAM Disk and mount it at your chosen drive letter mount point. The options are pretty straight forward, such as size of RAM to use for the RAM Disk, the drive letter top use as the mount point and the format to use for the file system. There were two others that I found to be a little more interesting:

  • Allocate Memory Dynamically – will instruct the RAM Disk driver to allocate all the memory specified under Size straight away, or to only allocate the memory as it’s needed by adding files to the RAM Disk file system. By ticking this option you can keep your RAM free for your computer to use for things like file cache or other applications and it will only be used for the RAM Disk when it’s needed to store the files you save to it. Alternatively  you can un-tick it and allocate the full Size amount and reserve the memory straight from the off.
  • Use AWE physical memory – This is found on the Advanced tab and will force the OS to never page the RAM Disk content, even in the case where the OS decides it’s low on physical memory. Be careful with this setting because it will force your RAM Disk to only use physical RAM. If you set your Ram Disk Size too high you could soon run out of physical memory and cause your computer to become unstable.

ImDisk-create-ram-disk

Click OK when you’re happy with your settings to create your new RAM Disk.

RamDisk-Properties

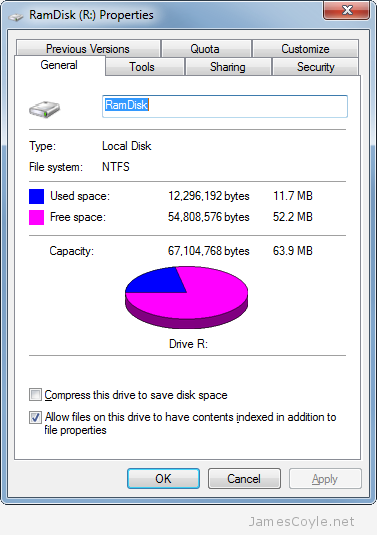
And that’s all there is to it! You now have a fully functioning Windows RAM Disk that you can use for fast file storage. Don’t forget, anything on the Ram Disk will be lost when you restart your computer.


Remove a Windows Service

Get Social!

windows-logoYou can easily remove a Windows service from the Windows registry using a simple command prompt command called SC.
SC is the command line utility which interacts with the Windows Service Controller and can be used to manage services on either a remote or local Windows machine.

You will need to find the name of the service you would like to remove before you can issue the SC command to remove it. You can either use the Windows Service console or the sc query command to find the name of a service.

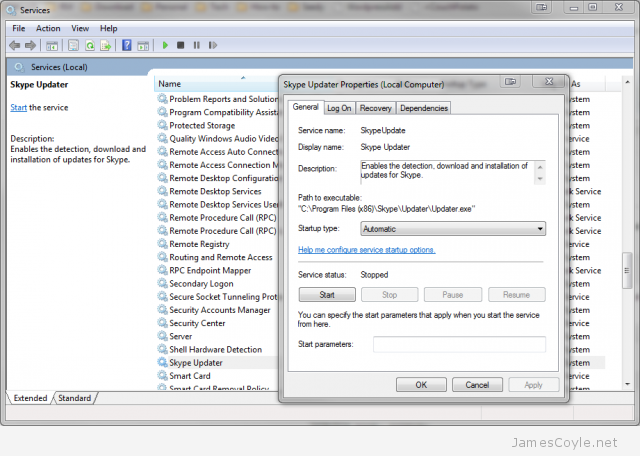
Click the Start menu and type in Services and click the Windows Services console in the list. Find your service by name and double click it to see the Properties window. The service name can be seen at the top of the form. The below example shows the Skype Updater service.

services-skype-properties

To use the sc query command to find your service name, open up a command prompt and type the below command.

sc query

Find the SERVICE_NAME attribute of your required service.

Once you have the service name, you will need to stop the service before you can delete it. Issue the sc stop command followed by the service name. The below example show how to stop the SkypeUpdate service.

sc stop SkypeUpdate

Finally, you can issue the sc delete command to remove the service.

sc remove SkypeUpdate

Windows Error: “The program can’t start because WMVCORE.DLL is missing from your computer” in Windows Server 2008″

Get Social!

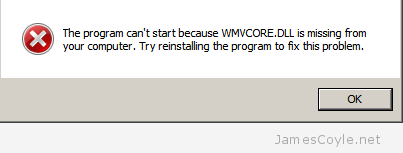
I recently received the below error when running Blue Iris CCTV software on Windows Server 2008.

The program can’t start because WMVCORE.DLL is missing from your computer. Try reinstalling the program to fix this problem.

wmvcore.dll-missing

The error is caused by not having the Windows Media Player libraries installed. You can easily resolve the error by installing the Desktop Experience for Windows Server 2008 which includes Windows Media Player.

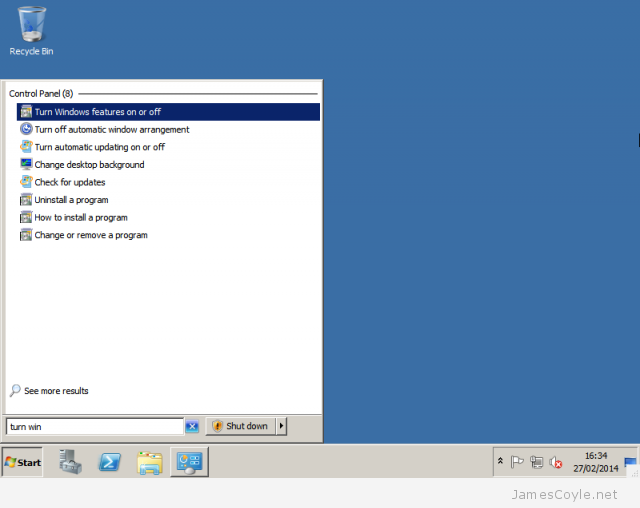
Click the start menu and start to type Turn Windows features on or off and click it when it appears in the menu.

turn-windows-features-on-or-off

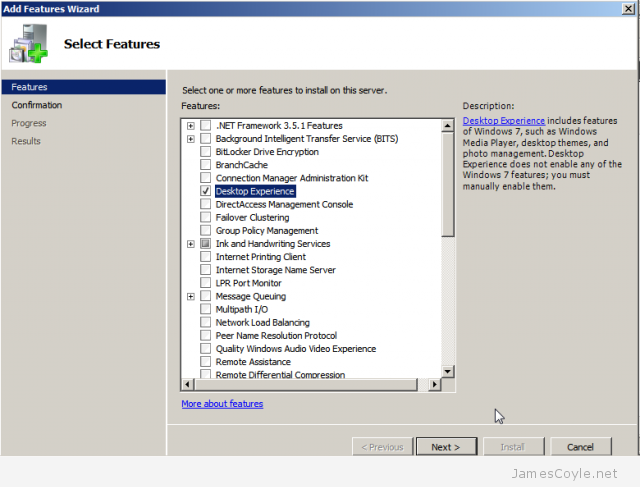
Click Features and click Add Features. Find the Desktop Experience entry and tick the check box. Click Add Required Features in the new dialogue which pops up.

desktop-experience

Click Next and then Install to install the required features. Click Close and then Yes to restart your computer and complete the installation.

When your computer restarts, click Close and Windows Media Player will now be available.

desktop-experience-complete


How to use PowerShell to (grep) Recursively Search for Text Within Files on Windows

Category : How-to

Get Social!

powershellThe thing I find most annoying with Windows is that it isn’t Linux. Let’s forget the argument of free software, the interchangeable GUIs, the security and everything else which constitutes the usual Linux vs. Windows argument and focus on things I use everyday in Linux which are missing in Windows. Two major things come to mind; tail for monitoring logs and grep which is the easiest way to find something in a file.
Not having grep, more specifically grep -r, is challenging at best and almost reason enough to avoid the platform entirely.

With the introduction of PowerShell, Windows has given us the grep functionality albeit with a much less finesse than the Linux equivalent. You have to pipe multiple commands together; one command to transverse the directories, and one command to look for the pattern within each file found.

Use the below command inside the directory you would like to perform the ‘grep’ and change [SEARCH_PATTERN] to match what you would like to match.

dir -Recurse | Select-String -pattern [SEARCH_PATTERN]

For example:

dir -Recurse | Select-String -pattern "Find Me"

As you can see, its nowhere near the memorable Linux command grep -r but at least its now possible go get similar behaviour in a Windows environment.

Other Windows grep Binaries

There are also various Windows binaries which can be used from a standard command prompt however I had limited luck with each one. The biggest issue was that they require dependencies such as .NET which are not usually installed in server environments.


Install Grails from Git on Windows

Category : How-to

Get Social!

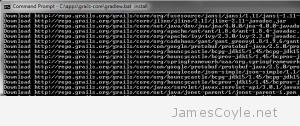
grails-core-gradlew.bat-installGood news: installing Grails from source is easy-peasey on Windows! Before you get started, you’ll need to have git and a JDK installed.

You can download both git and the JDK from the following locations:

Once these are both installed, set the JAVA_HOME variable from a command prompt. You’ll need to locate the exact java version which is in your Program Files\Java folder as it changes with each version.

set JAVA_HOME=C:\Program Files\Java\jdk1.7.0_25

Move to the folder where you would like to deploy Grails.

cd c:\apps\

And run the git clone command to start downloading the source.

git clone git://github.com/grails/grails-core.git

Move into the folder which was created with the git clone command.

cd grails-core

Finally run the install command which will download any further dependencies and compile the application.

gradlew.bat install

And that’s it! I told you it was easy.


Visit our advertisers

Quick Poll

Do you use GlusterFS in your workplace?

Visit our advertisers